asianart.com | articles
Back to Comments page
Dear Ulrich,
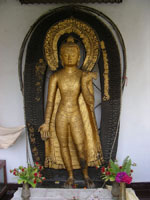
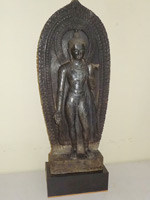
I agree with you, the standing Buddha image at Guita Bahi was most likely made during the time of the consecration, i.e., late 13th century. The proposed 6th century Gupta dating is not possible. Here are some observations I would like to add to your argument.
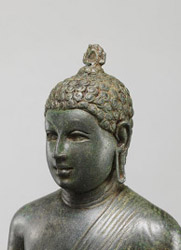
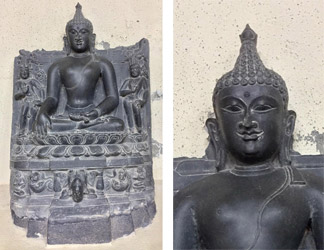
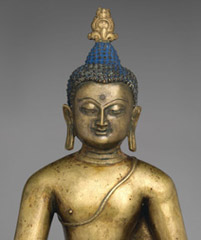
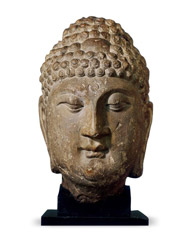
1. A deciding feature for the dating of this bronze is the prominent single pearl-like jewel set on the center top of the tall Ushnisha of the Buddha. To my knowledge, no dated Gupta or post-Gupta period Buddha image bears this distinctive pearl on top of the Ushnisha. The shape of early depictions of the form seems more generic, similar to a small, round, dome-shape single curl, as can be seen in an early 9th century Borobudur Buddha head (TG Figure 1). This feature can also be observed in two stone Buddha examples from Bihar during the second half of the 9th century (TG Figure 2); the shape is rather similar to contemporary Anuradhapura Buddha’s flamed pearl, perhaps reflecting exchanges between Bihar and Andra/Sri Lanka. From the 10th century onwards, this feature slowly gained more popularity among stone and bronzes Buddha images (TG Figure 3). By the 12th century the feature became very popular in both Bihar and Bengal, both in stone and bronze productions. In Bengal this feature became more elaborate, depicting a single round or oval jewel inset against background, or even coming out from a lotus flower. We will see this feature spread from Bengal to Nepal and to Tibet, and ultimately to China. In South India and Sri Lanka from the late 8th to 9th century onwards, this feature also developed and became more popular and more elaborate; it resembles a flaming pearl with radiating, undulating beams, a style that spread to Sukhothai art in 13th century (TG Figure 4).
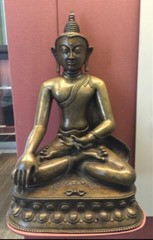
Here on the Guita Bahi Buddha, we can see the shape of the jewel on top of a very tall ushnisha is a continuation of the development of the late Northern Indian tradition in Bengal of the 12th century (see TG Figure 5). This single, large oval shape of jewel on top of Buddha's ushnisha can also be found in many 12th to 13th century early Tibetan and 13th to 14th century Buddha images in China through Nepalese craftsmanship (TG Figure 6, TG Figure 8). By the Yuan period, This feature has become the new standard for Chinese Buddha images. (TG Figure 7) The Chinese depiction of the flaming jewel appeared during 8th century and gained more popularity around the 10th century during the Five Dynasty period, perhaps originally inspired by Maha-Vaipulya-Buddhavamtamsaka Sutra. The position of the radiating pearl was not placed on top of the Ushnisha, but placed in the front, often half shown (TG Figure 9), as can be seen from late Tang Buddha images by 10th century and some Yunnan Dali Buddha images of 12th century (TG Figure 10).
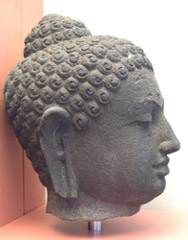 TG Figure 1 Borobudur Buddha Head 800 AD |
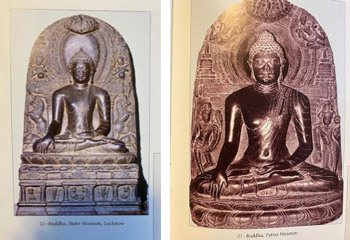 TG Figure 2 Two Buddhas, Kurkihar and Bodh Gaya Second half of 9th century |
 |
 TG Figure 3 Buddha, Gaya Around 1000 AD Patna Museum |
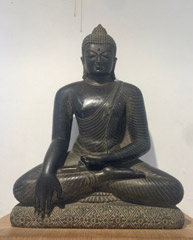 |
 TG Figure 4 Buddha, late Anuradhapura Period late 8th to 9th century Metropolitan Museum, New York |
 TG Figure 5 Buddha with tall Ushnisha surmounted by oval shape pearl Rajshahi District, Bangladesh, 12th century Rajshahi Archaeological Museum |
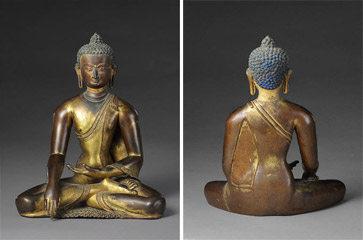
 TG Figure 6.1 Buddha Vajrasana Tibet, 13th century British Musuem |
 TG Figure 6.2 Buddha with a lotus-pearl surmounted on tall Ushnisha. 11-13th c. or 12th-13th c., Tibet Metropolitan Museum |
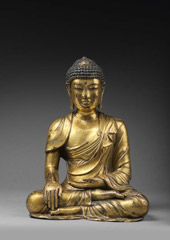
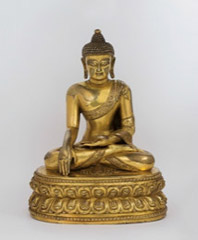 TG Figure 7 Buddha Yuan Dynasty, 14th century China Private Collection |
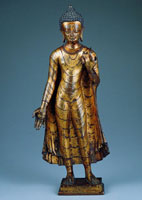
 TG Figure 8 Buddha made by Nepalese craftsmen Yuan Dynasty, Late 13th -early 14th century China Palace Museum |
 TG Figure 9 Buddha Head Tang Dynasty, 9th century |
 TG Figure 10 Buddha Dali Kingdom 12th century Poly Auction Hong Kong |
 article fig. 15 |
 article fig. 17 |
 article fig. 18 |
 article fig. 19 |
 article fig. 22 |
 article fig. 23 |
Tommy Yang Guo
11/03/2020
asianart.com | articles