asianart.com | articles
Back to the main article
(click on the small image for full screen image with captions.)
Following the earthquakes in Nepal, salvage from the badly damaged structures of the Kathmandu Darbar Square was stored nearby in the relatively intact old Hanuman Dhoka palace. Some months later UNESCO established a commission to identify the provenance of the many hastily gathered and undocumented objects. During this work the supposedly lost frieze came to light. It was, as it had been, divided into two long sections; in the earthquake each section was broken in two and somewhat damaged — particularly at the breaks — but aside from these breaks the frieze is surprisingly intact. Now we could match the author’s photos to their corresponding location in the frieze.
But something was amiss. We were unable to place the location of four of them, viz., Figures 17, 20, 27, and 31. They simply could not be found in the frieze. Therefore, as mysterious interlopers we will remove them from our revised article (forthcoming) and the corresponding references in the text.
Here is what happened. Wandering through old Kathmandu so many years ago the author had stopped at Pimche Bahal, an old Buddhist monastery not far from Kasthamandapa. There on a roll of black and white film she took a few photographs of wood carvings. Her next stop was Kasthamandapa where, on the last frame of the roll she took a frieze detail and continued with more on a new roll. When many weeks later she looked at the proof sheets of the developed rolls she mistakenly recorded the similar contiguous monastery photos as part of the Kasthamandapa series.
Soon after finding the salvaged frieze there ensued a second amazing development. One of the people engaged to identify the salvage was Sukra Sagar Shrestha, a friend of the author’s and retired staff member of the Department of Archeology. As a post-retirement hobby he continued exploring Nepalese culture and in March 2013, just two years before the obliterating quakes, he photographed the entire frieze in situ. He has given us permission to show these wonderful photographs here.
We present the frieze below in four photographs (figs 1 -4), one for each broken piece of each half of the frieze. In each figure, the photograph of the entire piece of the recovered frieze, taken by Sameer Tuladhar on Sept. 7, 2016, is positioned above, with Sukra Sagar Shrestha’s photos below that, and in the bottom position, Mary Slusser’s figures from the paper in the locations in which they appear in the frieze. Each of these figures has details showing each part of the frieze in detail, with the equivalent section of the recovered frieze by Sameer Tuladhar above and Sukra Sagar Shrestha’s pictures positioned below and, where available, Mary Slusser's pictures from the article in the bottom position. A further detail shows the breaks in each panel, with the break in the recovered panel shown above and Sukra Sagar Shrestha’s images of the intact frieze taken in 2013 shown below. All of these photographs can be enlarged in the main image page by clicking on the image and further enlarged by clicking on the “enlarge” icon in the upper left.
A revised version of the article will be forthcoming soon.
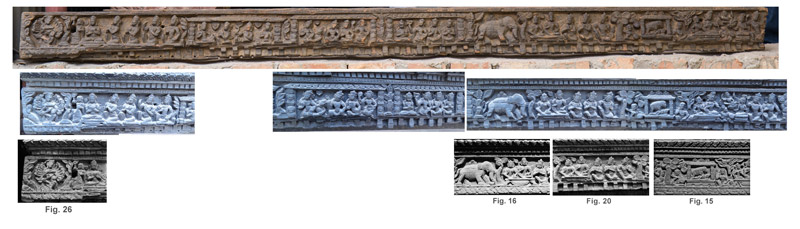
Fig. 1

Fig. 2
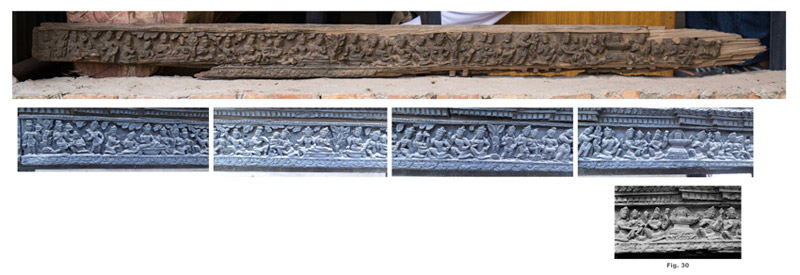
Fig. 3
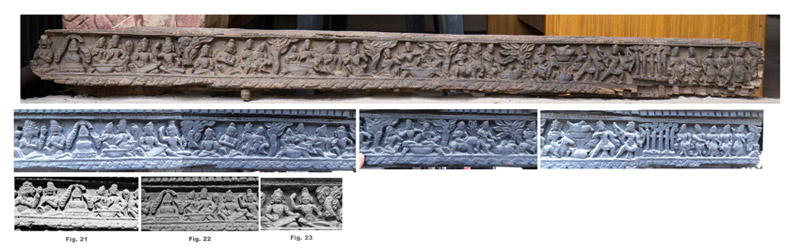
Fig. 4
Back to the main article
asianart.com | articles